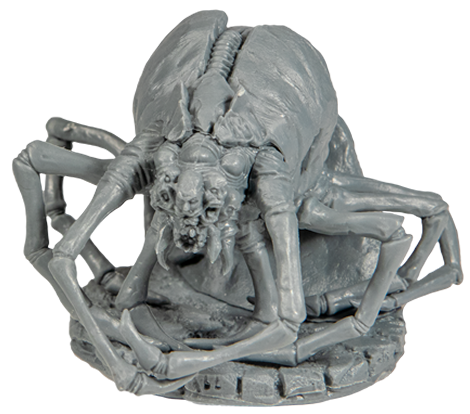
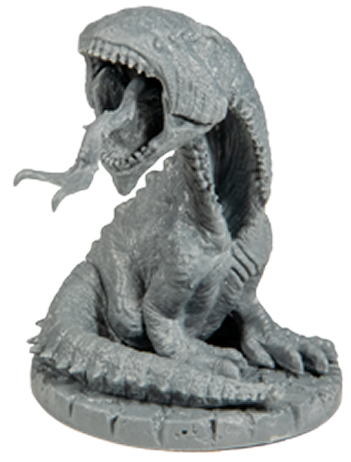
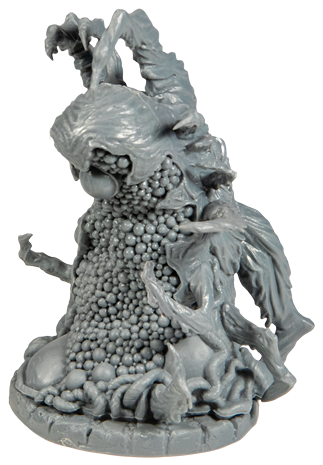
How to Awaken Atlach-Nacha (Cost 6):
Combat: 4
Spinnerets (Action: Cost 1): If Atlach-Nacha is in an Area that is lacking a Web Token, place one there.
Web Tokens are in 6 different Areas
Awakening: Take the Independent's Loyalty Card, Spellbook and tokens, and add them to you pool. Place the Independent's figure on the Map, under your Control. There are no limits to how many Independents you may Control, and you may use one Independent to help you Awaken another.
Death: If your Independent is Killed, place it's Loyalty Card, figure, unused tokens, and Spellbook back into the general Pool (tokens already on the Map remain there). If you had earned its Spellbook, it "falls off" the Loyalty Card and is no longer in effect. If this Independent is Awakened again, even by the same player, the Spellbook must be earned anew.
Spellbook: Each Independent has its own Spellbook to be earned. When a Spellbook's requirements have been met, place the Spellbook on the Independent's Loyalty Card; you may reap that Spellbook's benefits as lon as you control that Independent. This Spellbook does not count as one of your "Faction" Spellbooks for any purpose, and it cannot be placed on your Faction Card.
Doom Phase: When you perform a Ritual of Annihilation, do NOT gain an Elder Sign for any Independent Great Old Ones you Control.
Note: For your first game with Independents, it is recommended to use one fewer Independent than the number of players.
Immediately win the game, even with fewer than 6 Faction Spellbooks.
How to Bokrug (Cost 4):
Combat: 1
Ghosts of Ib (Ongoing): If Bokrug is killed, you do not lose this Loyalty Card. Instead, place Bokrug’s figure on this card. At the end of the next Doom Phase, return Bokrug to any Area of the Map that does not contain any enemy Units. If there are no such areas, Bokrug remains on this card until the next Doom Phase.
Take this Loyalty Card and give it to the player of your choice. That player then places Bokrug's Spellbook on this card.
Awakening: Take the Independent's Loyalty Card, Spellbook and tokens, and add them to you pool. Place the Independent's figure on the Map, under your Control. There are no limits to how many Independents you may Control, and you may use one Independent to help you Awaken another.
Death: If your Independent is Killed, place it's Loyalty Card, figure, unused tokens, and Spellbook back into the general Pool (tokens already on the Map remain there). If you had earned its Spellbook, it "falls off" the Loyalty Card and is no longer in effect. If this Independent is Awakened again, even by the same player, the Spellbook must be earned anew.
Spellbook: Each Independent has its own Spellbook to be earned. When a Spellbook's requirements have been met, place the Spellbook on the Independent's Loyalty Card; you may reap that Spellbook's benefits as lon as you control that Independent. This Spellbook does not count as one of your "Faction" Spellbooks for any purpose, and it cannot be placed on your Faction Card.
Doom Phase: When you perform a Ritual of Annihilation, do NOT gain an Elder Sign for any Independent Great Old Ones you Control.
Note: For your first game with Independents, it is recommended to use one fewer Independent than the number of players.
At the end of the Doom Phase, select an enemy and one of these two options:<br>1) Your enemy chooses a Monster or Cultist of yours to Eliminate.<br>ORb<br>2) He chooses one of your Elder Signs to discard.
How to Awaken Father Dagon (Cost 4):
Combat: 2 on Land, 6 in an Ocean Area.
Tsunami (Action: Cost 1): Choose a Land Area adjacent to an Ocean Area. All Cultists in the Area must be moved into adjacent Ocean Areas by their owners (this includes your Cultists). In a dispute over who moves first, you decide.
You have 8 Units in Ocean Areas.
Awakening: Take the Independent's Loyalty Card, Spellbook and tokens, and add them to you pool. Place the Independent's figure on the Map, under your Control. There are no limits to how many Independents you may Control, and you may use one Independent to help you Awaken another.
Death: If your Independent is Killed, place it's Loyalty Card, figure, unused tokens, and Spellbook back into the general Pool (tokens already on the Map remain there). If you had earned its Spellbook, it "falls off" the Loyalty Card and is no longer in effect. If this Independent is Awakened again, even by the same player, the Spellbook must be earned anew.
Spellbook: Each Independent has its own Spellbook to be earned. When a Spellbook's requirements have been met, place the Spellbook on the Independent's Loyalty Card; you may reap that Spellbook's benefits as lon as you control that Independent. This Spellbook does not count as one of your "Faction" Spellbooks for any purpose, and it cannot be placed on your Faction Card.
Doom Phase: When you perform a Ritual of Annihilation, do NOT gain an Elder Sign for any Independent Great Old Ones you Control.
Note: For your first game with Independents, it is recommended to use one fewer Independent than the number of players.
During the Doom Phase, remove one of your Acolyte Cultists from the Map and out of the game permanently. Gain 6 Power. This is not optional. If you have no Acolyte Cultists on the Map, there is no effect.
How to Bokrug (Cost 4):
Combat: Equal to the number of Cultists your opponent has on the Map.
Mummify (Action: Cost 1): Any enemy Acolyte Cultists sharing an Area with Ghatanothoa are immediately “Mummified.” Lay Mummified Cultist figures on their sides. Such Cultists cannot use the Move Action, do not participate in Battle, and produce no Power during the next Gather Power Phase. During the Doom Phase, stand any Mummified Cultists back up. (A Mummified Cultist can be Captured. If a Cultist Controlled a Gate before becoming Mummified, it retains Control of that Gate.)
EITHER you hau havve fewer than 6 total Gates and Cultists in the Doom Phase,
OR
As an Action, pay 4 Power.
Awakening: Take the Independent's Loyalty Card, Spellbook and tokens, and add them to you pool. Place the Independent's figure on the Map, under your Control. There are no limits to how many Independents you may Control, and you may use one Independent to help you Awaken another.
Death: If your Independent is Killed, place it's Loyalty Card, figure, unused tokens, and Spellbook back into the general Pool (tokens already on the Map remain there). If you had earned its Spellbook, it "falls off" the Loyalty Card and is no longer in effect. If this Independent is Awakened again, even by the same player, the Spellbook must be earned anew.
Spellbook: Each Independent has its own Spellbook to be earned. When a Spellbook's requirements have been met, place the Spellbook on the Independent's Loyalty Card; you may reap that Spellbook's benefits as lon as you control that Independent. This Spellbook does not count as one of your "Faction" Spellbooks for any purpose, and it cannot be placed on your Faction Card.
Doom Phase: When you perform a Ritual of Annihilation, do NOT gain an Elder Sign for any Independent Great Old Ones you Control.
Note: For your first game with Independents, it is recommended to use one fewer Independent than the number of players.
The Mummify Ability is no longer an Action. It now occurs instantly when any enemy Acolyte Cukltists share an Area with Ghatanothoa.